How to simplify login authentication when switching between multiple tenants/subtenants
Introduction
Imagine that you are an administrator of a Cumulocity IoT platform with one management tenant and multiple subtenants. Your job is to manage and monitor these tenants. You set up a Data broker to forward the required data from the subtenants to the management tenant so that you can coordinate the whole picture. Suddenly you find anomalies in some of the subtenants and you need to log in to each subtenant separately to check the details.
While you are entering your username and password again and again, you might be wondering if Cumulocity also supports Single Sign-on (SSO). The answer is yes, here is a detailed article to explain how to set up SSO for a tenant using Auth0:
 Using Auth0 as Single-Sign-On for Cumulocity IoT Knowledge base
Auth0 is a popular service offering authentication as a service and can easily be connected to be used with Cumulocity IoT as a SSO provider. The following steps will show how to correctly configure both the Auth0 and Cumulocity IoT account. Prerequisites A tenant on Cumulocity IoT. You will need admin access to be able to configure the SSO provider inside Cumulocity IoT. A tenant on Auth0. There is a free plan available that supports up to 7000 users and gives all the functionality we need…
And here is an instruction shows you how to integrate your tenant with Okta:
 Cumulocity IoT SSO Integration with Okta Knowledge base
Cumulocity IoT can integrate with Okta as an identity provider (IDP) using OpenID Connect. The connection can be made with out of the box functionality from both Cumulocity IoT and Okta. This document will guide users through the process of making the initial integration. Prerequisites Cumulocity IoT tenant with access to the Administration application and permissions to modify Authentication settings Okta account with permissions to create custom applications and custom authorization serve…
In this article, I will go one step further, which is to make multiple tenants use the same SSO user account. This will simplify the login authentication when switching between multiple tenants. This article will base on the configuration using Auth0 shown here.
Pre-requirements
- Finished the Single Sign-on setting of the first Cumulocity tenant properly
- At least one more Cumulocity tenant and a user with Tenant management admin permission of the tenant
Additional settings for Auth0
Setting in Auth0
After finishing the steps in this article, now you should create a single-page web application, an API, a login flow, and a user in your Auth0 tenant. And now you should be able to log in to the first Cumulocity tenant via SSO using the credentials of that user.
Now you just need to keep adding the other Cumulocity tenants you need to the Auth0 application.
- Open the application you created in the applications list
- Find “Allowed Callback URLs” in the Application URIs section under the Setting tab
- Add Cumulocity tenant URLs ending with
/tenant/oauth - Save changes
[ ](global.discourse-cdn.com/techcommunity/orig.. "Screenshot 2023-05-08 at 16.07.58")
It will take about 1 min after saving the changes before they take effect. During this time you may receive a “Connection reset” error message if you try to log in.
Setting in Cumulocity
When you configure SSO for more Cumulocity tenants, most of the settings are the same as for the first tenant. Please follow the steps in this article. There are only two minor differences:
- The values of ‘state’ in ‘Authorization request’ don’t need to be consistent
- Every Cumulocity tenant has its own ‘Redirect URI’ in ‘Basic’, namely
https://<<current_tenant_URL>>/tenant/oauth
Testing
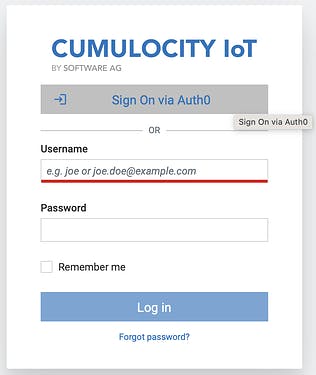
Now you can log in to the first tenant via SSO first, then access the other tenant in your browser, click on the SSO button and it will skip the authentication step and open the application directly. It would be more evident to test it in a new incognito browser window in case you forget to log out before testing.
[ ](global.discourse-cdn.com/techcommunity/orig.. "Screenshot 2023-05-08 at 16.54.33")
Skip the login page
If you don’t need the input field of username and password and would like to skip clicking the SSO button when you switch to another tenant, you can achieve it by changing the login mode of the Authentication.
Warning!!!: Before changing the following settings, you need first to complete the SSO configuration properly. More importantly, give your SSO user ‘Tenant Management’ ADMIN permissions (ROLE_TENANT_ADMIN or ROLE_TENANT_MANAGEMENT_ADMIN) to make sure you can change the settings back in the UI.
- Assign the Admin permission to the SSO user in Auth0
- Check the Access Mapping in the SSO settings section of the Cumulocity tenant, and make sure the admin permission is properly configured
- Go to the Administration app of Cumulocity, and make sure that the role ‘admins’ already has Tenant Management admin permission checked
- Go to the Administration app of Cumulocity and open the Authentication tab under the Settings
- Choose ‘Single sign-on redirect’ as the preferred login mode in the login settings section under the basic settings of the Authentication
- Save the change
Now you only need to log in via SSO once when you jump between multiple tenants.
In case you cannot set the other login option visible again, there is a REST API endpoint that can be used to change the settings:
/tenant/loginOptions. For more information please check the API documentation.
Summary
Single Sign-on functionality is not restricted to the login of the management tenant and its subtenants. It is also helpful when you have a large number of unrelated tenants.